Swiss Chard

As mild-flavored as spinach and withstands heat better than most other greens. This plant has huge, dark green, juicy leaves and have broad, thick midribs and are delicious in stir fries. If you are a first time gardener and like Swiss chard, you will have success with this plant. You will get plenty of harvest from just few plants.

Swiss chard, which is also known as white beet, strawberry spinach, seakale beet, leaf beet, Sicilian beet, spinach beet, Chilean beet, Roman kale, perpetual spinach, silverbeet and mangold (and that's just in English!) can also be grown in pots, but just make sure not to overcrowd them in the pot. This means that even apartment dwellers can have swiss chard almost all year long. Swiss chard plants look attractive and vibrant so you can even plant them in between your flower or ornamental gardens. It would be like planting Hostas, but swiss chard instead. The bonus part is that you can harvest and eat them, unlike Hostas.

I discovered that I can trick my son into eating Swiss Chard by adding them in my bread or bun roll recipes. Finely chopped, he doesn't even notice. He will ask about the green color, and I just say something in the lines of "that's the nutrients or vitamins". Try it, and you can feel good about having your child eat so much bread if not much of anything else.

When to plant. Plant when the soil is at least 40 degrees F. The plants are quite cold hardy, so in many places it's not too late to start some seeds for a late fall/early winter crop. Chard plants do well even in heat (mid-80s).

How to plant. Sow in outdoor row as soon as ground can be worked (Zone 7, April - July). Place one seed every 3 inches and cover firmly with soil. Prefers full sun. Thin to 6 inches apart when plants are 3 inches tall. Use thinnings as fresh greens. Keep plants heavily mulched and moist.


Light
Full sun
Seed Depth
1/4 in
Spacing Row/plant
20 in/ 6 in
Days to germinate
 7-10
Days to harvest
60
Preserve by
Freezing & canning


Harvest. When plants are 7 inches tall, cut outer leaves at soil level with sharp knife. Harvest will continue all season if inside leaves are permitted to grow. Below is a picture of some of my harvest last year. In the picture you will see Swiss Chard, Bok Choy, Snap peas, and young Spinach leaves. Chard is the one with thicker stalks.

Health Benefits. Swiss chard is bursting with nutrients, including vitamins K, A, C and E, plus several B vitamins, magnesium, manganese, potassium, iron and dietary fiber.

Recipes: Here are some links to favorite Chard recipes. When I have time I will post my own recipes.

Roasted Swiss Chard with Feta cheese
Sauteed Swiss Chard with Parmesan Cheese
Simple Swiss Chard
Swiss Chard Quesadillas (Guadalajara, Mexico)

Bitter Melon

Bitter melon is also known as bitter gourd. This plant is a fast-growing, trailing or climbing vine with thin stems and tendrils and requires trellis to support the climbing vine.Why is the name bitter melon? You guessed it! This vegetable is bitter, but very sweet to your good health (see Health Benefits). Liking bitter melon is an acquired taste, and yet there is a way to reduce its bitterness. To do so, you must sprinkle salt over the sliced fruit and let it soak in its salty juice for 10 minutes, then rinse prior to cooking. I had two plants last summer (2011) and I had probably about 8 pods. I am definitely planting more this year, just thinking about it makes me salivate for its bitterness.

When to plant. Bitter melon is an exotic Asian plant, therefore, it likes warm weather. In zone 7 where I am, I would plant them outdoor in May or start seeds indoor in April to maximize time for production.

cracked seeds germinated in 5 days as in above
How to plant. On a single pit (2 ft diameter and soil loosened to 1.5 ft deep)  you can plant about five to six seeds about 6 inch apart. It would take about 14 days for the seed to germinate. You can try soaking the seeds in water for a couple of hours prior to planting. You can also set them on a wet paper towel and then covered with another wet paper towel (like making bean seed to sprout) and place them in a warm spot. I did this (see picture) and I tested out with some cracked seeds and some not, if you have a good seed, you should see that it starts to germinate in about 6 days, well the cracked ones anyway. The un-cracked seeds will take longer, about 2 weeks, then plant it in a pot indoor if the weather is
still cool, or directly plant it outside when night temperature is above 70 degrees F.

Note: Crack the seed as if you were eating sunflower seeds or pumpkin seeds.

Harvest. When the fruits are ready for harvest, their spines (or ridges in the case of Chinese variety) will become less pointy. The ends of spines will get round. This is the best time to harvest them. Once the fruit turns yellow, the seeds inside will look like its coated with red color, those are the seeds you can plant for next season. Yellow fruit is not desirable for cooking, they can get really mushy.

Health Benefits. (http://yourhomegardenblog.com/vegetable-gardening/how-to-grow-exotic-and-delicious-bitter-melons-on-your-backyard)

Once you acquire their taste, they can become a delicacy for your palate. And they are excellent source of various vitamins including A, B1, B3, B3, B6, B9, B12, C, E and K as well as Iron and Magnesium.

According to wikipedia, bitter melon has been used in various Asian traditional medicine systems for a long time. Like most bitter-tasting foods, bitter melons can stimulate digestion. Bitter melons have been used by Asians for centuries and is a popular medicine in Chinese Medicine for diabetes mellitus type 2.

Bitter Melon contains four very promising bioactive compounds. These compounds activate a protein called AMPK, which is well known for regulating fuel metabolism and enabling glucose uptake, processes which are impaired in diabetics.

Bell Peppers

Pepper is a tender, warm-season vegetable. Pepper plants require somewhat higher temperatures, grow more slowly and are smaller than most tomato plants.When I first started growing bell peppers, I was not sure whether the green, yellow, and red were different plants, but as it turns out they are one and the same and they are just different stages of the fruit.

When to plant. Peppers are best started from seeds indoors in late winter and then transplanted into the garden after the soil and air have warmed in the spring, late April or early May.

How to plant. I started with the seeds I took off of a red pepper plant that I bought from the store. I have had success with this and had never bought seed from a packet. Set transplants 18 to 24 inches apart in the row, or 14 to 18 inches apart in all directions in beds

Note: Peppers do not do well on cold and wet soil. The most common problems later in the season are hot, dry winds and warm nights (above 70°F). Periods of extreme heat, with or without wind, may prevent fruit set, especially in some varieties.

Harvest. Fruits may be harvested at any size desired. Green bell varieties, however, are usually picked when they are fully grown and mature—3 to 4 inches long, firm and green. When the fruits are mature, they break easily from the plant. Less damage is done to the plants, however, if the fruits are cut rather than pulled off. The new, colored bell pepper fruits may be left on the plant to develop full flavor and turn into variety of colors.

Health Benefits. Nutritionally, peppers vary depending on the variety and stage of maturity. In general, all peppers are a good source of vitamin A and C; the red ones are bursting with these two antioxidants. Antioxidants are a group of nutrients that neutralize free radicals in the body fluids reducing the risk of disease.

Spinach

The super-cold-hardy vegetable is a tender crop that can be planted in very early spring, as well as fall and winter. Here in North Carolina, I start direct planting at the end of February. The temperature should not be warmer than 70 F in order for the seed to germinate. Spinach has similar growing conditions and requirements as lettuce, but it is versatile in nutrition and its ability to be eaten raw or cook.


When to plant. Spring plantings can be made one week before to one week after last spring frost date, as long as the soil can be properly worked. It's important to seed as soon as you can to give spinach the required 6 weeks of cool weather from seeding to harvest.
In fall, six to seven weeks before your first fall frost date, sow your main crop for fall harvest.
About four weeks before your first fall frost date, sow winter spinach in a place where the seedlings can be covered in frigid weather with glass, plastic or a thick row cover. This planting will mature in early spring.
How to plant. Sow in row directly outdoors as soon as ground can be worked. Place one seed every 2 inches and cover with soil.  Planting depth should be about 1/2 inches, 8-10 days to germination, spacing  6 " per plant.

Harvest.  Harvest entire plants at soil line when outer leaves are 6 inches long or just cut away outer leaves as needed for continuous crop until hot weather. Sow again in later summer. In spring, long, warm days cause spinach to “bolt” (flower and produce seeds). Unless you plan to save seeds, pull up the plants when you notice them developing a tall central stem. Thoroughly clean, then steam-blanch (which limits their uptake of water and fixes enzymes) and freeze bumper crops.

Health Benefits. Loaded with vitamins A, C and the B-complex vitamins. It is higher in iron, calcium, and vitamins than most cultivated greens

Broccoli

I love broccoli. They taste even better when it is freshly picked from my own garden. I have nothing but success with my broccoli planting experience. My son started out as a picky eater, but when I started growing my own garden, he became a great vegetable eater. He would pick broccoli from the garden and eat it. He would even ask me at times if he could have broccoli for snack. To hear my son ask for broccoli for snack is one of my best reward for gardening.

When to plant. Sow in sunny location in early spring or late summer. for an earlier start in spring, start seeds indoors 6-8 weeks before setting out. Here in North Carolina, I usually start mine in mid January to transplant in mid-March. For fall harvest, plant seeds direct in end of July.

How to plant.  Plants prefer a firm soil and just enough water to prevent wilting.


Light
Full sun
Seed Depth
¼ “ / 6 mm
Seed Spacing
1 “ / 2.5 cm
Row Spacing
18-24 “ / 45-60 cm
Days to sprout
 7- 14
Plant Spacing
12-18” /30-45 cm
Days to maturity
80-100


Letting broccoli plant to seed
Harvest. Each plant produces a large head. Cut just before buds begin to open, 6 " beneath the cluster of buds. After the head is harvested, it "sprouts" numerous smaller heads. In case you are wondering, this small sprout will not grow to the size like the original head. Again, harvest sprouts before it blooms.

Health Benefits. A good source of Calcium, phosphorous, vitamins A, B, & C, and fiber.

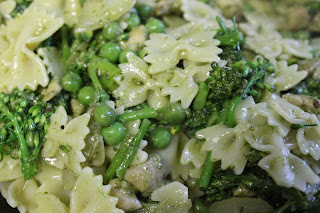
Pesto Chicken Pasta


INGREDIENTS:

1- 2  Chicken breast or bone less chicken thighs
2 cups broccoli
6 ice cube size of pesto (1/2 cup pesto sauce)
1/2 cup of frozen peas
green beans or string beans (optional)
1 onion
2 garlic cloves, chopped
sun dried tomatoes (optional)
2 cups of bow tie pasta
black pepper
Parmesan cheese

Note: The proportion of the main ingredient is really up to you. If you want more meat or vegetables, then feel free to add more of these ingredients. You can also add more pesto sauce to your liking depending on how strong of a pesto taste you would like on your pasta dish.

DIRECTIONS:

1. In a separate pot of water, bring water to boil and throw in bow tie pasta until cooked. Drain and set aside.

2. In a heated large frying pan, melt frozen cubes of pesto or put pesto sauce in a pan. Pesto has lots of olive oil in it so I do not usually use oil to saute. Saute onion, garlic, and chicken until chicken is tender and cooked.


3. Add in peas and broccoli.When vegetables are ready, turn heat down to medium low.


4. Add in pesto in the pan to mix in with the vegetables and chicken. Stirring well to mix the sauce well with the rest of the ingredients. At this point you can decide to add more pesto if desired.  Sprinkle black pepper.

5. Sprinkle Parmesan cheese and serve it hot. Enjoy!

Vegetarian Spring Roll


INGREDIENTS:

Firm tofu, cubed
1 onion
2 to 3 garlic cloves
2 carrots, cut into strips, 2 approximately inches in length
cabbage, 2 cups shredded
2 cups of bean sprout or  1 cup of cooked black eyed beans
soy sauce & pepper to taste
Oil for stir frying
Egg roll wrapper (thicker kind)

DIRECTIONS:

1. Saute garlic, onions, and tofu for 2 minutes. Add cabbage, carrots, and bean sprout or cooked black eyed beans.

2. Season with soy sauce and pepper to taste.

3. Wrap spring rolls. I used Nasoya egg roll wrappers. For instructions on how to wrap, please see Spring roll (meat).

4. Deep fry spring rolls. Test the oil if it is ready and hot by dipping a corner of a spring roll, if it sizzles, then it is ready for deep frying. With hot oil, just about less than a minute on both sides. Fillings are already cooked so we are just basically cooking the wrapper making sure it is crunchy enough.

5. Serve hot with sweet chili sauce.


Basil

Basil is almost always used in Italian dish. I certainly do a lot of cooking using pesto sauce, which is mainly made of Basil.  Basil has a very strong and desirable scent as most any herbs do, which means that the scent will likely repel any insects, making this plant an insect-free plant.

When and How to plant. Plant seeds indoor about 6 weeks before the last frost or plant direct after any danger of frost in a sunny, most, well drained location.

Light
Full sun
Seed Depth
 1/4 in
Spacing Row/plant
10/6 in
Days to germinate
10-12
Preserve by
Freezing or drying


 Harvest. After 7 weeks, break off the center buds/leaves to encourage sprouts along the sides of the stem. Frequent harvest encourages the plant to produce more leaves. Ones a stem produces flower, foliage production stops and the stem will turn mature looking, brown in color. If you want more foliage, break off bolts or flower buds.
To dry leaves, pinch of leaves from the stem and dry them in a well ventilated area for about 4 days. If there is still some moisture to the leaves after this time, you may use the oven to dry. You must use the lowest heat.

Health Benefits. Basil is a good source or iron, Vitamin C, potassium, and calcium, which are all nutrients necessary for a healthy body.

Recipes. Here are some links I have used that includes Basil.

Pesto Sauce
Pasta, Pesto, & Peas

Chunky Hushbrown with Cheese

INGREDIENTS:
3 medium size potatoes, cubed
2 eggs, scrambled
1 cup of shredded mozzarella cheese
1 - 2 tbsp of olive oil

DIRECTIONS:
  1. Saute or fry cubed potatoes. This is best done in non-stick pan.


2. Once potatoes are almost done, pour in scrambled eggs. Spread cheese over it.


3. Flip it over (flip it over to a similar size pan to prevent it from falling apart), spread more mozzarella cheese. If you prefer crispier, melt and cook cheese a little longer.

4. Serve it with ketchup. Yummy!


 This is one of my son's favorite breakfast. I did not add salt in the recipe since mozzarella is a bit salty already. If you want you can add salt or black pepper.

Tortilla Espanola


INGREDIENTS:

4-5 medium potatoes
Half onion
Oil
Salt to taste
5-6 eggs

DIRECTIONS:

  1. Peel and thinly slice the potatoes and onions.
  2. In a frying pan in medium heat, put the potatoes and onions with a big pinch of salt. Cover with vegetable oil, enough to almost cover all the potatoes.
  3. Fry the potatoes and onion till tender and well done, cutting them with a wooden spatula to make the pieces of potatoes smaller, like a size of a quarter.
  4. When all the potatoes are done, strain all the oil and set aside.
  5. In a big bowl scramble the eggs, add a pinch of salt and add the potatoes. If not well cover with the egg  add a splash of milk or another scrambled egg.
  6. Heat 1 tablespoon of oil in a skillet big enough to fit all the potato egg mixture and heat for a couple of minutes in medium –low heat. Add the mixture and  moved a bit with a spatula to get an even layer… cook without moving for 7 minutes.
  7. Then place a large plate over the pan, flip the pan to transfer the eggs onto the plate. Cooked side should be golden brown. Carefully slide tortilla back into pan, and cook the other side for 5 to 10 minutes.
  
Courtesy of Ava Haeberlin, Relief Society Birthday Celebration, March 2012

Beef Broccoli Stir Fry


INGREDIENTS:
1 lb of tenderloin beef, sliced thinly
Broccoli
2 stalks of celery
2 cloves of garlic
1 onion
1 tbsp olive oil 
2 tbsp soy sauce
1/4 cup of water
black pepper


DIRECTIONS:

1. Saute garlic, onions, and beef for about 3-4 minutes.

 
2. Add in sliced (1/4 in size) celery. Stir fry for 3 minutes.
 3. Add in broccoli. You can put as many broccoli as you want. As seen in the picture, these were broccoli from my garden, some of the buds had already bloom so that you can see a hint of yellow color on the broccolis.


4. Add in soy sauce, black pepper, and 1/4 of water. Cover pan and let it simmer for about 2 minutes. Uncover and stir. If you like more sauce, feel free to add water and soy sauce to taste. Our family like sauce over our rice so I add more water as desired.


5. Serve it hot over steamed rice.
 
Enjoy!


New Zealand Impatience

New Zealand Impatience
Perennial plant, super easy to grow. It seeds itself and it provides continuous bloom from spring to early fall.

Petunia


How to care:
  • 6+ hours of daily sun
  • water daily
  • 8-16 in tall x 9-12 in wide
  • Hardy to 40 degrees F
  • Blooms summer
  • Best in fertile, well-drained soil

Daffodils


How to care:
  • 8+ hours of daily sun
  • Water once weekly
  • 6-24 in tall x 4-8 in wide
  • Hardy to -20 degrees F
  • Remove spent blooms
  • Slow release feed in spring
  • When ground is frost free, can be planted outdoors. Plants in containers should have good drainage and be rotated often for equal light distribution.

Tulips


 How to care:
  • 8+ hours of daily sun
  • Water once weekly
  • 6-24 in tall x 4-8 in wide
  • Hardy to -20 degrees F
  • Remove spent blooms
  • Slow release feed in spring
  • When ground is frost free, can be planted outdoors. Plants in containers should have good drainage and be rotated often for equal light distribution.

Hyacinth (Purple)


How to care:
  • 8+ hours of daily sun
  • Water once weekly
  • 6-24 in tall x 4-8 in wide
  • Hardy to -20 degrees F
  • Remove spent blooms
  • Slow release feed in spring
  • When ground is frost free, can be planted outdoors. Plants in containers should have good drainage and be rotated often for equal light distribution.

Plum tree

Plum tree blossoms

Santa Rosa dwarf plum tree

Dogwood Tree

Eggplant


My first eggplant was the Early Long Purple type, and it was very productive (see picture). This eggplant is long, slightly bulbous, and the slender fruits are meaty and easy to slice. This year (2012) I will try and plant Black Beauty eggplant, rounder in shape and when it is ready to harvest, the color appears as black purple with shiny skin.

When to plant. Start indoors in warm, sunny location 8-10 weeks before transplanting outdoors. Wait 3 weeks after frost to transplant outside. Or, in warmer climates, sow directly in garden when night time temperature falls to around 55 F.
Note: Eggplant require full sun, and rich, fertile, and well-drained soil.

How to plant. Planting depth should be 1/4 inches, spacing about 2 1/2 feet per plant.

Harvest. All eggplant varieties should be harvested when fruit is shiny and before skin turns dull. Continual harvest will encourage more production. Harvest at about 6" long. Cut woody stem with pruners, rather than pulling and twisting it or you could end up with a broken limb or plant. If seeds inside are dark, fruit is past its prime. For black beauty variety, make sure the fruit is slightly bigger than your hand, again paying attention that it is shiny.

Health Benefits. Low in calories and high in vitamins A, C, and B group.

Recipes:
Chicken with Eggplant and taro root
Torta or Eggplant omelet (Torta is Tagalog term)


Cannelloni

INGREDIENTS:

Egg roll wraps
1 lb lean ground beef
1/2 medium onion, chopped
1 clove garlic, minced
1 pkg (10-oz or 11/4 cup)frozen spinach, thawed and squeezed dry
1/2 tsp Italian herb seasoning
1 cup shredded Monterey Jack Cheese

Sauce:
1 can (15 oz) tomato sauce
1/2 cup of water
1/2 tsp Italian herb seasoning

DIRECTIONS:
1. Crumble meat into skillet; add onion and garlic. Cook over medium heat until meat is browned, about 5 minutes. Remove excess oil.

2. Add spinach and Italian herb seasoning; mix well. Let mixture cool.

3. Combine sauce ingredients in a bowl. Pour half of the tomato sauce into a 9" x 13 " baking pan.

4. For each cannelloni, spoon 1/3 cup of mixture at one end of the wrap, roll wrap around filling, and place the seam side down in pan.

5. Pour remaining sauce over top, being sure to moisten ends of each wrap.

6. Cover and bake at 350 degrees F for 40 minutes. Uncover, sprinkle with cheese, and return to oven; bake until cheese melts, about 6 minutes.

Chicken with Taro root and Eggplant

INGREDIENTS:
2 Chicken breasts, cut into cubes
3 medium taro root, cut in quarters
2 medium eggplant, cut into serving size
1 can of coconut milk, unsweetened
1 onion
2 to 3 garlic cloves
1 to 2 tbsp of cooking oil for frying
1 tsp curry powder
Salt and pepper to taste

DIRECTIONS:
  1. In a medium pot saute garlic, onions, and chicken in hot oil for about 5 minutes.
  2. Add the coconut milk and curry powder.
  3. Add in taro roots. Bring to a boil, taro roots take about 10 minutes to cook. 
  4. When taro roots are halfway done ( 5 minutes past), add in eggplants. Eggplants will take about 7 minutes to cook.
  5. Add salt and pepper to taste. Serve hot over steamed rice or as side dish. Enjoy.

Taro root plant

How to Grow Taro Root
Taro root, also known as corm, was not a strange sight to see at any produce market where I grew up, in the Philippines. Taro root is a vegetable crop and is called "gabi" in Tagalog language. Not only is the taro root eadible, but also its stalk and leaf. The root is starchy just like potatos, but can be a bit slimy while peeling and even when it is cooked. I usually wear thin gloves when I peel them as they can make your palm itchy and flaky. Despite this, the root crop is delicious and also the leaves (see Recipes). The first time I tried growing taro root was in 2011 and I thought it was pretty successful. I got the tubers basically from the store and kept them in storage (dark, room temperature area) until they started to sprout as shown in the picture.

When to plant. Taro root can be planted in the spring when the soil temperature reaches to about mid 70 F and above. Although it is a perennial plant, it will only grow back so long as the ground does not freezes.                                                                 

How to plant. Plant the bulb 2 to 3 inches deep. Make sure that the ground is consistently moist. As you can see in the picture, the plant will grow to about 3 - 6 feet tall and about 1 1/2 feet wide, so make sure you space the planted bulbs accordingly. 

Harvest. You can harvest taro roots just like you would harvest sweet potatoes or potatoes. Generally, taro root will be ready to harvest when you notice the leaves are starting to wilt.

Health Benefits. (http://www.nutrition-and-you.com/taro.html)
Taro or dasheen corms have more calories than potatoes. 100 g provides 112 calories. Their calorie mainly comes from complex carbohydrates known as amylose and amylopectin. However, they are very low in fats and protein than in cereals and pulses. Their protein levels are equivalent to that of other tropical food sources like potato, cassava, banana, etc. The corms, however, are free from gluten. They feature high quality phyto-nutrition profile comprising of dietary fiber, and antioxidants in addition to moderate proportions of minerals, and vitamins. It is one of the finest source dietary fibers; 100 g flesh provides 4.1 g or 11% of daily-requirement of dietary fiber. Together with slow digesting complex carbohydrates, moderate amounts of fiber in the food helps gradual rise in blood sugar levels. Taro leaves as well as yellow-fleshed roots have significant levels of phenolic flavonoid pigment antioxidants such as �-carotenes, and cryptoxanthin along with vitamin A. 100 g fresh taro leaves provides 4825 IU or 161% of RDA of vitamin A. Altogether, these compounds are required for maintaining healthy mucus membranes, skin and vision. Consumption of natural foods rich in flavonoids helps to protect from lung and oral cavity cancers. It also contains good levels of some of valuable B-complex group of vitamins such as pyridoxine (vitamin B-6), folates, riboflavin, pantothenic acid, and thiamin. Further, the corms provide healthy amounts of some important minerals like zinc, magnesium, copper, iron, and manganese. In addition, the root has very good amounts of potassium. Potassium is an important component of cell and body fluids that help regulate heart rate and blood pressure.


Tamarind soup with taro root

INGREDIENTS:
2 lbs of pork ribs
2oo grams of Tamarind soup base
2 medium tomatoes
1 whole onion
2 - 3 pcs of Taro root
1 tbs of chopped ginger
6-8 cups of water
Vegetables (green beens, spinach, chilli pepper for spice, bell pepper young leaves)
1 Banana Planting (optional) cut in quarters
Fish sauce or soy sauce
Salt

DIRECTIONS:
  1. Boil pork with ginger and onions in water until the pork is tender.
  2. Add taro root. Taro root will take twice as long to cook the rest of the vegetables that will be added. Make sure taroo root is cooked halfway before adding all the other vegetables. (You may add the banana planting with the vegetables)
  3. About 3 minutes before everything is done, that is when you add the Tamarind soup base, fish or soy sauce, and salt to taste.
  4. Served hot. Enjoy.

Sweet Potato

How to grow sweet potato.

Sweet potato plants are very easy to grow. Once planted, it can take over your garden space if you let it. I love the sweet potato tops and the tubers. I usually start my plant by placing a tuber in water 3/4 of the way, placing the pointy end upward.  In a month's time, depending on the type of sweet potato, temperature, etc., you will see what is known as the "slips". Slips can be snipped or pulled off for planting once they are about 4-5 inches long. Slips will continue to grow from the eye of the tuber. You can also snip the slips and place it in separate jar of water. I do this specially when the temperature outside is not ready for it to be planted.

My harvest in 2011 (5 plants)
Once established, trim plants to 18 inches long to send growth to the root crop. I did not get much crop last year since I let my plants grow to harvest young sweet potato tops for stir fry.