Bean Sprouts


Day 1

  1. Rinse 1/2 cup of mung beans at least three times to remove all the impurities.
  2. Soak the mung beans in a bowl of water overnight or up to 24 hours.
  3. Cover the bowl with a plate. Keep the bowl of beans in a dark area at room temperature.


Day 2

  1. Transfer mung bean sprouts to a container or any storage with a strainer. I used my pasta strainer.
  2. Rinse them at least twice to discard the bean skins and other impurities.
  3. Drain the water.
  4. Cover the container or strainer.
  5. Keep the container inside a garbage bag or black bag to prevent any exposure to light.

Day 3-7

  1. Rinse mung bean sprouts two to four times daily to retain moisture. The hotter the environment, the more often you need to water the sprouts.
  2. While rinsing the sprouts, make sure to remove any unsprouted beans you find. This reduces the possibility of bean decay.
  3. Drain the water.
  4. Keep the container inside a garbage bag, and keep it in a dark area.


Benefits of Starting a Home Garden


I love gardening. I enjoy watching the miracle of growth from seeds to young plants and to when plants blossom and start producing. I love the fact that I can eat a healthy meal from my garden--hand picked vegetables, washed,  and cooked and within 15-30 minutes- it is already being served for my family to eat.

I get excited when Spring comes. I try to prepare my seedlings ahead of time, I also enjoy picking out young plants from a nearby nursery, and start dreaming away all the crops I will be getting and the canning hours I will be spending. Gardening is a lot of work, but also very rewarding for me personally and my family.

Have you ever thought about raising your own garden? Are you feeling a little inadequate? Let me tell you my story. Before I moved to NC, I was living in a big city of Vancouver, BC, Canada. I was an office worker, a student, and raising a family at the same time. When I came here, I was not working, not a student anymore, and had no family or friends around. Suddenly I have all the time in the world and decided to try gardening. My husband built me garden beds, other than that I knew very little about gardening. Thankfully for me, I am neighbors with Sister Hanna and at that time, she was my Relief Society president. If you don't know her, well, she is a pro at home gardening. She often shared her wealth of knowledge on the matter as well as her seeds. So with a boost of little information and seeds, I started. I must say, I grew with my plants with the experience and learning that took place over the years.

A bountiful harvest!

My gardening hobby has brought me joy in my life, provided me with free exercise, and has often bring my family together as we help each other work in the garden.

Let us look at some benefits of home gardening to help you decide whether you want to start growing your own garden.

1. Gardening is open to anyone. If you are willing to work, you can have a garden. Often times people think they need a big yard to garden. The truth is, even if you live in an apartment, you can raise a garden in containers and pots. Of course, it would really help to have a spot where there is at least 4-6 hours of direct sunlight (or less depends on the plant you are growing), other than that, all you need is a great attitude and some creativity.

2. Gardening is therapeutic. Personally for me, when I start digging in the dirt and preparing the soil or watering or harvesting and I am outdoor, it is very relaxing and I forget all the other cares of the world while I am gardening. I often sometimes have opportunity to ponder and have spiritual enlightenment while gardening. It helps me to relax. When I was living in the city, I tried to do container gardening and very little gardening plot in my patio garden. After work, after dinner and dishes or sometimes before dinner and dishes, i get out there and put on my garden gloves. It is such a change of pace from working in an office, it was soothing and relaxing. I remember telling my husband, if he ever get me a bigger yard, he may never see me at home. I would be gardening all the time because of the relaxing benefits I get from doing so.

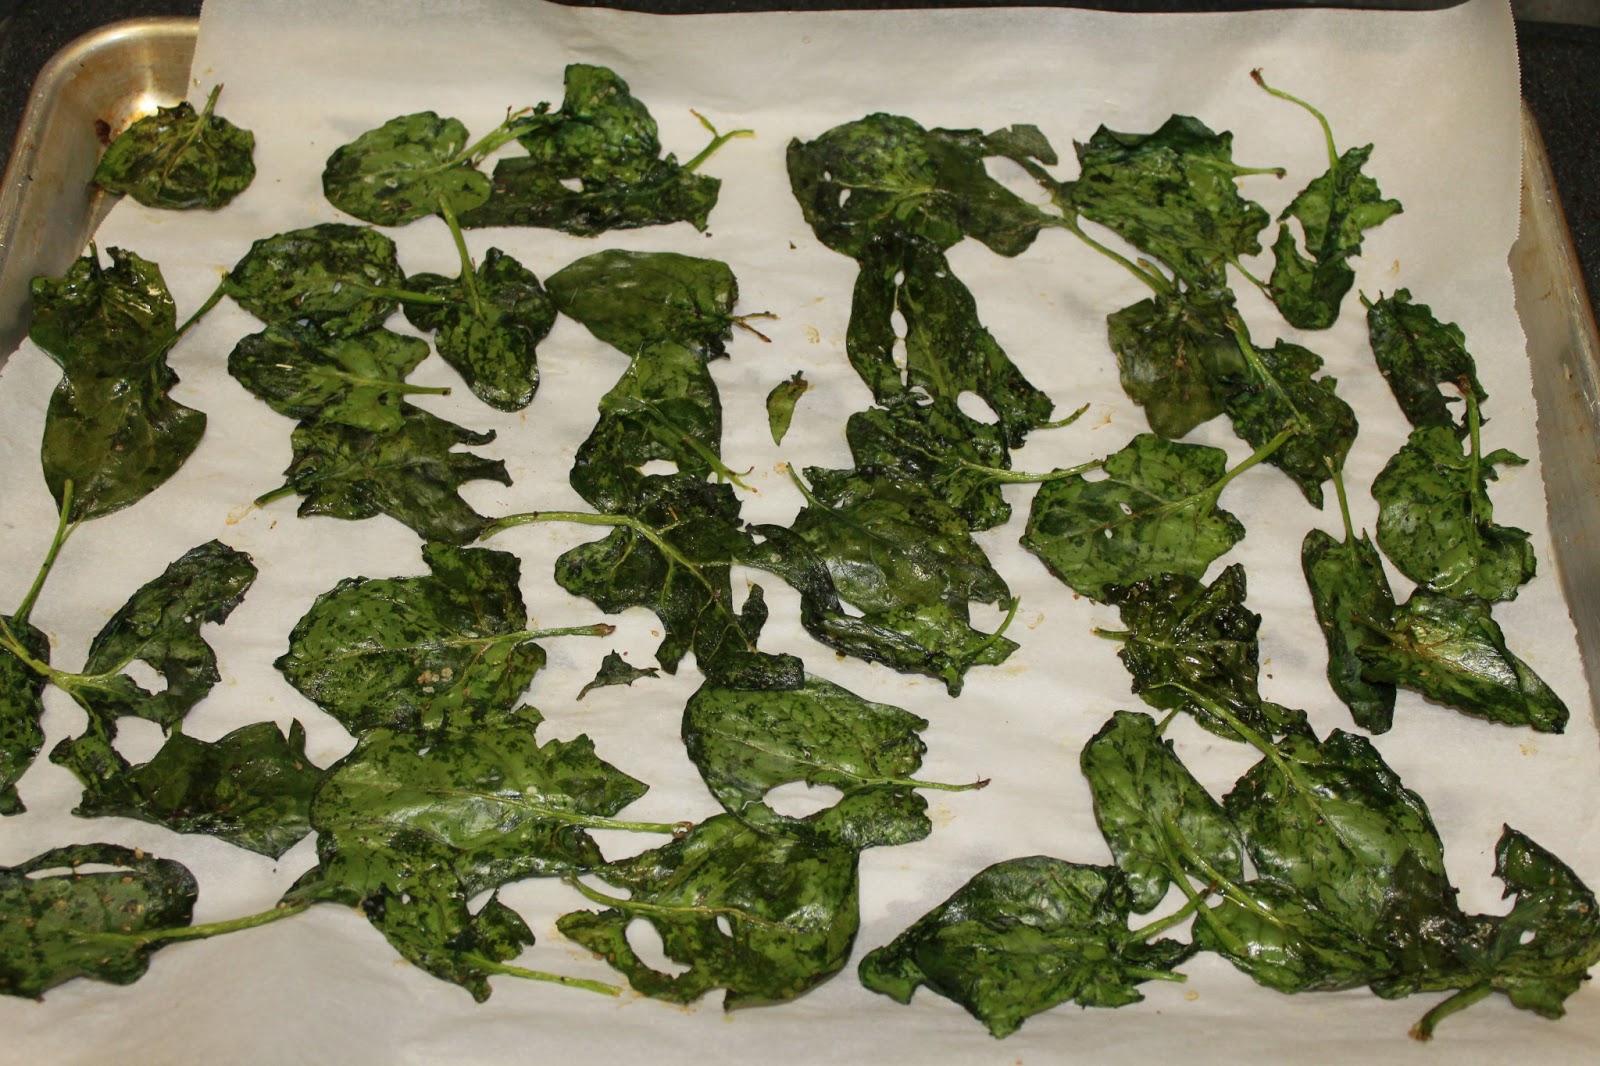
In addition, I can plant what I want to eat that is not usually found in regular store like bitter melon, asparagus beans, taro root, etc. Furthermore, I can use more of the vegetable plant other than its fruit. For example, I use belle pepper leaves in my soup as an herb and it adds a great aroma and added flavor to the soup. I can also use broccoli leaves as I would use collard greens in my stir fry, soup, and even broccoli leaves for baked chips.
Bitter melon and asparagus bean (long green string bean to the right)
Taro root (edible root crop/foliage)
String beans, also known as Asparagus beans


3. Gardening is a family affair. One of my favorite times with my kids is when they are helping me in the garden. They have their own little gloves and trowels, and they get dirty.  I let them put seeds in the whole I make and I let them water the garden. We have fun times getting dirty and getting wet. I teach them about weed, plants that are unwanted, and plants we want to grow. I teach them different name of plants and what each plant look like. They learn hard work, and patience. Harvest time is another favorite time. I send my kids, my son Adam 2.5 years old, Audrey 4.5, and Elias 8, with their own scissors and basket and they have fun filling their baskets and bowls with green beans, or sugar peas when they start producing plenty. They love it. When I serve it on the table, I remind them and they know it that it was the seed that they planted that gave the vegetables they are eating. Gardening gives us the opportunity to bond together, learn and work together as a family.


4. Home garden can save you money. I have not really taken the time to weigh how many pounds my garden produce, but I know that in the immediate time, I am saving a some dollar by not having to purchase vegetables that I am growing in my garden and also being able to preserve some harvest through canning for future use.So make sure you plant the vegetables you like to eat. You can also grow herbs that you can use fresh or dried for future use then you do not have to spend the money to buy them.


In the long run, I think I am really saving a lot because we are eating healthy whole foods more as opposed to processed food. Good health means money saved.

5. Home gardening is Green and Sustainable. There is nothing like eating a meal with ingredients you know where they came from and when they were picked. That is organic gardening when you have them right in your backyard. You are helping planet earth and saving money at the same time.

Organic can be expensive, but if you can have your own compost that should help. Not only that you are producing compost material for your garden you are also saving some good food scraps from filling the land fill.

HOW TO START A HOME  GARDEN

1. Check for the perfect sunny spot!  When I walked around my yard, it was obvious where I needed to start building our garden beds. It was a spot that got the most sun. However, you also need to consider what kinds of plants you are planting. Some plants wants more sun, others like part shade.
You also need to consider whether the spot you chose have access to some water supplies. It will make it easier to water your plants in the future.


2. Preparing your soil.  I live in an area where the dirt is red clay. I mean it gets really hard in the summer, it almost becomes red rock. I brought in a truck load of dirt for my 3 -- 8x 16 inc beds. It had some cost to start up, but that was choice. I wanted to start with bigger beds. You can do container gardening, buy some good dirt or if you have any composted material in your yard that you can use. If you have good dirt, remove grass, till the ground and loosen the soil. You want it loose enough for the plants you will be planting. You want a healthy soil that can hold moisture, which we will discuss later.


I have a combination of container gardening, garden beds, and vertical gardening. I have used old pails for container gardening. For vertical gardening, I have some plants planted on the bottom of my patio wall.  You can plant cucumber,peas, or other plants that climb and use your fence as trellis. This can help you save space and grow upward as oppose to outward.


3. Prepare your seedlings. I usually refer to my Calendar to figure out when to start my seedlings and when to transplant them outdoor. I have an Indoor grower that I have been using to start my seedlings indoor. I also buy some seedlings at a nursery nearby. Stores like Lowes, Home Depot, or Walmart have some inexpensive seedlings to help you get started.


4. Consider your watering needs. I have 3 - 55 gallon water barrels at the corner of my house close to the garden beds. It has helped me save some by catching rain water. Some of us here maybe lucky to have well water and does not have to worry about the cost of watering plants. Make sure you have easy access to watering plants.

5. Green for Go! You are now ready to plant after you have prepared your garden beds or container gardens in a sunny or part shade are. Make sure to water your seedlings well before transplanting so they do not go into shock once transplanted outdoor.

Try to plant a good variety for better success!  Sow seeds or plant at different times to stagger and prolong your harvest.


Points to remember once you have your garden going.

1. Ignoring soil heath: attempting to grow high quality plants from a low quality soil. I am pretty sure I am experiencing this somewhat. I always said I had beginners luck when I had my first year of gardening and I had more crops. I guess over the years I have not fully replenished the nutrients that have been used up in my soil so my plants are not as productive as it was in my first year that I brought in fresh new great dirt. I do compost, but I don't have enough to amend the health of all my garden beds.
I have recently done the soil testing to determine what kind of minerals I have in my dirt which helped me determine what I need to amend it to have better production.

Here is the link to  Agronomic Services  where you can get information on soil testing and reports. They have divisions near your areas so find out where they are located and you can drop or mail your soil samples for testing and you should get your result (call them back to follow up) within 10 days.

You cannot expect to have great harvest or better tasting ones if you do not have an amazing soil to start with. The easiest way to improve your soil's health and its nutrient holding capacity is to add organic matter to your soil like manure, vermicompost, peat moss, and other organic matter.

2. Poor timing. I am just not very patient sometimes. This year I was so eager to plant my tomatoes out by mid April and I should have waited a week or so more to avoid the cold spell over night. Tomatoes like warmer climate and needless to say, my tomatoes did not survive. It also important to acclimatize your seedlings prior to transplanting outdoor.

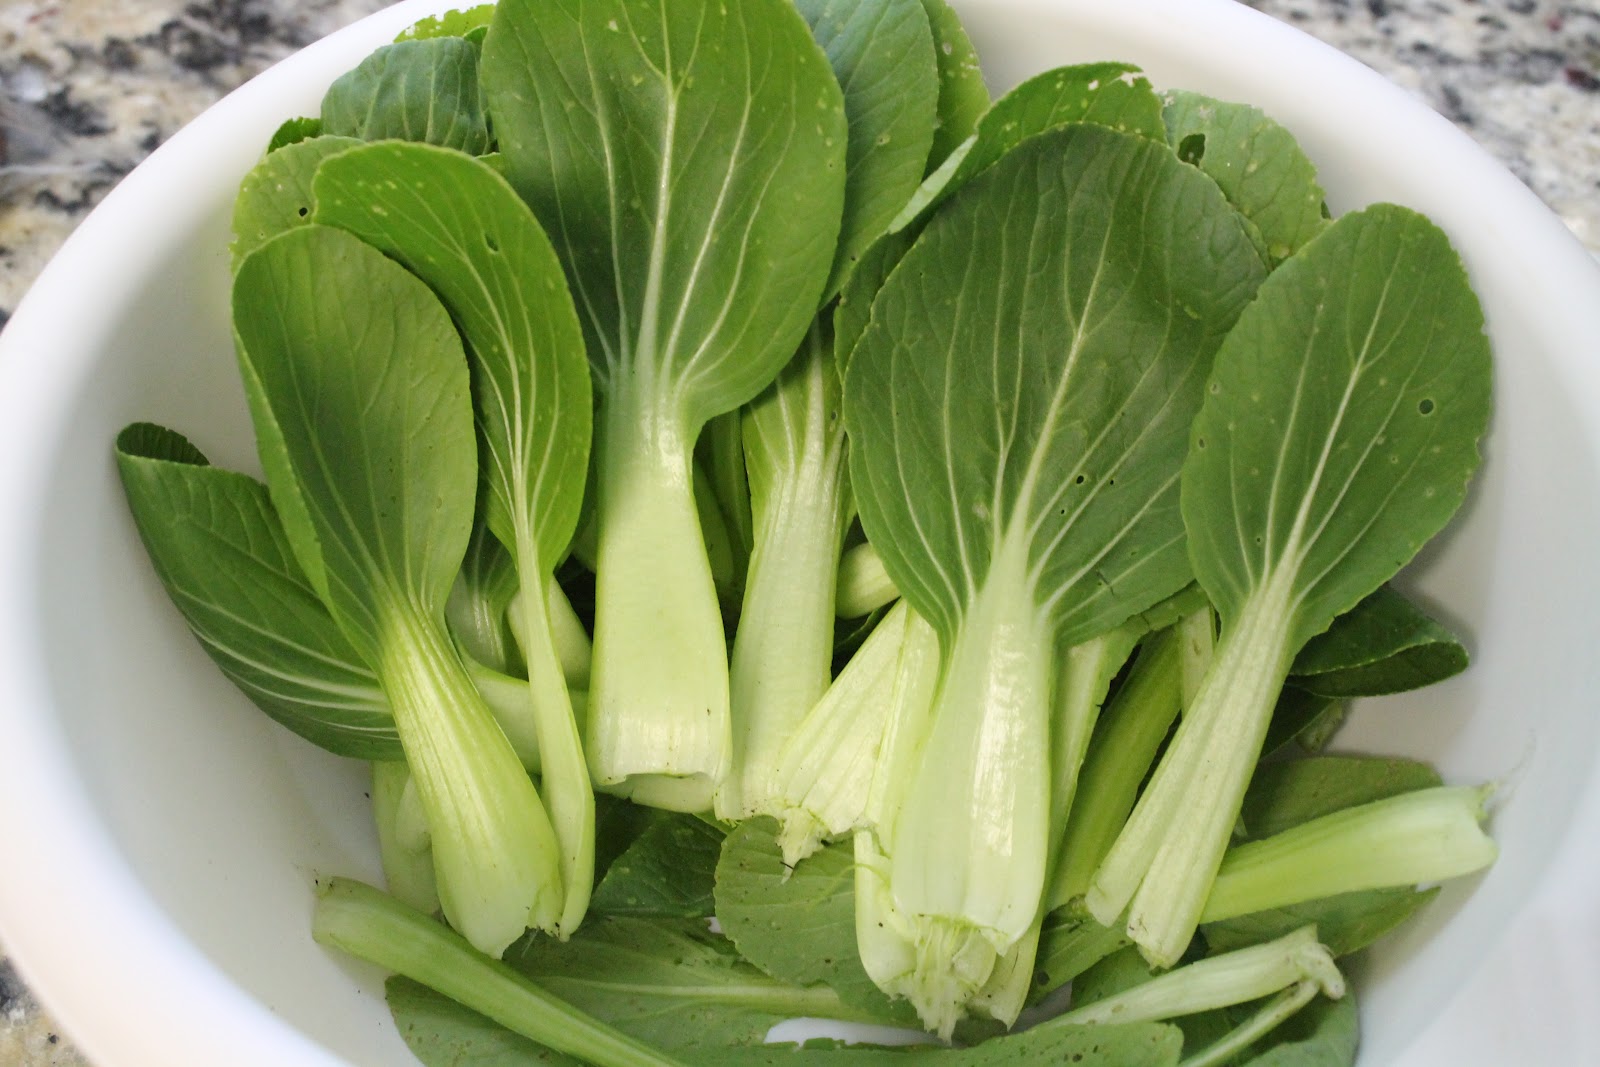
There are plants that loves the sun like tomatoes, bell peppers, eggplants; and there are plants that like cold weather like broccoli, cabbage, brussel sprouts, spinach, lettuce, etc. So make sure you plant the right plants in the right season.

3. Over watering or under watering plants. Drowning your plants is not good for them. It is also true when you do not water your plants enough. Find the right balance. Some plants needs more water than others. You can do well to water your plants 2 - 3 times a week on a good week. Try not to shallow water making the roots to stay on shallow or top area of the ground instead of deeper in the soil. On a hot day over 90s, you might need to water every other day. It would help to have some mulch around your plants to keep moisture, keep weeds out, and can add organic matter to the garden. 

4.Remember to rotate your crops. This is a simple way is so effective at preventing disease  because it always keep pests on the run.  With crop rotations, pathogens and even insects can never anticipate or get use to certain crops being in a certain place. It would make it hard for insects and pathogens to successfully establish themselves and reproduce.  

5. Do not overdo pesticide. Pesticides kills both good and bad insects. Maintain a good gardening habit to prevent having to use pesticide, but if you have to, keep it at a minimum use. It is not environmentally friendly. 

Here are some helpful links to help you identify, eliminate, and control garden pests.

                Eco-Friendly ways to get rid of garden pests
                Squash Bugs
                Tomato pests/disease: Hornworms ,  Aphids , Blossom-End Rot
                Broccoli Aphids, Flea Beatles


The single best way to increase your soil’s health and nutrient holding capacity is to add tons of organic matter

The single best way to increase your soil’s health and nutrient holding capacity is to add tons of organic matter

wweeewe

Soil Test Report

After 4 years of gardening, I finally got myself enough curiosity to find out how my soil is doing. It seemed that I had the first timer's luck on my first year that I harvested quite a bit of crop from the garden with my newly brought in top soil. I noticed as years pass on, it seemed that my plants did not produce as vigorously as they did the first year (well, i had the deer battle the other years too).

I am excited to actually know what is in my dirt. It took me sometime to comprehend what the report meant and how each component actually affects my vegetable gardening.

Below is the report that came back with my two soil samples. The three bars represented pH, Phosphorous (P), and Potassium (K). I was happy to know that both my samples are in the optimum range for pH.

Soil pH is a measurement of the alkalinity or acidity of the soil. The soil pH range is measured on a scale of 1 to 14, with 7 as the neutral mark — anything below 7 is considered acidic soil and anything above 7 is considered alkaline soil. The middle of the range on the soil pH scale is the best range for bacterial growth in the soil to promote decomposition. The decomposition process releases nutrients and minerals into the soil home of our plants, making them available for the plants or shrubs to use. Soil fertility depends on pH. The mid range is also perfect for micro-organisms that convert the nitrogen in the air into a form which the plants can readily use.

Phosphorous helps a plant convert other nutrients into usable building blocks with which to grow. It is the "P" in the NPK balance that is commonly found in fertilizers. If your plants are small and produce very little flowers, you may have Phosphorous deficiency. Plants cannot have too much Phosphorous as it is difficult for them to absorb, however they can be a pollutant when it runs off to water supply area. Looks like my soil is good amount of Phosphorous.

Potassium is important to plant growth and development. Potassium helps:
  • Plants grow faster
  • Use water better and be more drought resistant
  • Fight off disease
  • Resist pests
  • Grow stronger
  • Produce more crops
With all plants, potassium assists all functions within the plant. When a plant has enough potassium, it will simply be a better overall plant. The first report you see below labeled MBED (my Middle garden bed sample) is deficient in Potassium. I think this explains why I have tall tomato plants, but never produced at all.

To amend the possible combination of deficiencies, the report suggests the right right fertilizer. For example, my first report recommends NPK fertilizer 15-0-14. The second report suggests NPK fertilizer of 21-0-0.

By the way, the soil test does not measure the nitrogen level (N). Nitrogen fertilizer recommendations are based only on the needs of specific crop.  Nitrogen is the most important component in the soil. All plants require nitrogen for healthy growth and reproduction.

Other than the recommended NPK fertilizer, organic compost material should help bring your soil to an optimum level necessary to have a successful harvest in the end.

Here is link to NC Department of Agricultural and consumer services for more information on soil test services and reports. Soil test are provided for free at a certain time of year (maximum of 3 soil samples per person).


Double Knock Out Roses


Water: Semi-moist
Average Height: 3-4' H x 3-4' W
Spacing : 3-4 '
Growth Rate: Medium
Cold Hardiness: -20 to -30 F
Pruning: Prune while dormant
Fertilization: Spring and Summer

Planting Steps:
1. Dig hole 2 times width of pot
2. Set top of root ball even with ground level
3. Combine planting mix and soil. Fill to ground level and tamp
4. Form water basin. Water to settle soil
4. Add layer of mulch. Check often for water until established.

Carribean Salsa

You Will Need:

  • 10 cups chopped cored peeled tomatoes (about 25 medium)
  • 5 cups chopped seeded green bell peppers (about 4 large)
  • 5 cups chopped onions (about 6 to 8 medium)
  • 2-1/2 cups chopped seeded chili peppers, such as hot banana, Hungarian wax, serrano or jalapeño (about 13 medium)
  • 1-1/4 cups cider vinegar
  • 3 cloves garlic, finely chopped
  • 2 Tbsp finely chopped cilantro
  • 1 Tbsp salt
  • 1 to 2 ripe mangos, cubed
  • 2 cans of tomato paste
  • 2-3 Tbsp of brown sugar, depends on your liking of sweetness for salsa
  • 6 qt or 12 pint glass preserving jars with lids and bands


Half Recipe:

  • 5 cups chopped cored peeled tomatoes (about 13 medium)
  • 2-1/2 cups chopped seeded green bell peppers (about 2 large)
  • 2-1/2 cups chopped onions (about 3 to 4 medium)
  • 1-1/4 cups chopped seeded chili peppers, such as hot banana, Hungarian wax, serrano or jalapeño (about 7 medium)
  • 3/4 cup cider vinegar
  • 1 to 2 cloves garlic, finely chopped
  • 1 Tbsp finely chopped cilantro
  • 1-1/2 tsp salt
  • a can of tomato paste
  • 1 ripe mango, cubed (or you can put as many as you like mangos)
  • 1-2 Tbsp of brown sugar depending how you like your salsa sweet
  •  Tbsp brown sugar
  • 6 (16 oz) pint

Directions:

  1. PREPARE boiling water canner. Heat jars in simmering water until ready for use. Do not boil.  Wash lids in warm soapy water and set bands aside.
  2. COMBINE tomatoes, green peppers, onions, chili peppers, vinegar, garlic, cilantro, salt, brown sugar and cubed mango, if using, in a large stainless steel saucepan. Bring to a boil over medium-high heat, stirring constantly. Reduce heat and boil gently, stirring frequently, until slightly thickened, about 10 minutes.
  3. LADLE hot salsa into hot jars, leaving 1/2 inch headspace. Remove air bubbles and adjust headspace, if necessary, by adding hot salsa. Wipe rim. Center lid on jar. Apply band until fit is fingertip tight.
  4. PROCESS both pint and half pint jars in a boiling water canner for 15 minutes, adjusting for altitude. Remove jars and cool. Check lids for seal after 24 hours. Lid should not flex up and down when center is pressed.

Cilantro


Cilantro, hmmm, it smells so good. My cilantro plants survived the winter. I have plenty and they go to bolt quickly than I can consume and give away so I try and cut the mature branches to prolong the life of the plant as it continues to produce younger plants/branches beside the mature branch that I just cut out. Below is a picture of one of my cilantro plant going to bolt so I can save seeds for next planting seasonl


Share with me!

Thank you for visiting my website. This is still a work in progress. Most of my pictures were taken in year 2011, but this blog was started just February 2012. This is a whole new adventure for me. Although my blog is about gardening and food, it is far be it from toiling in the dirt or tasting cuisine. There is a lot to share and learn. I am very very excited. Here is a challenge for you.

Pickled Watermelon rind?

 Exactly right! Who would have thought that you can pickle water melon rind? Well, I got to try it and it is pretty good. My husband said it almost tasted like chunky pineapple tidbits, less the cinnamon flavor. It is certainly new to me, but I am the kind of person that don't like to waste anything. This has a new taste and I like it. I have yet to try other ways to use water melon rind, but here is the recipe I used:

Ingredients: (Yields 5-6 pints)
4 lbs watermelon rind
2 cups vinegar (white)
2 cups water
4 cups sugar
3 cinnamon sticks
1 teaspoon whole cloves
1 teaspoon whole spice
1 lemon, sliced thin

Brine
1/4 cup of salt
1 quart water

Preparations:
Pare watermelon rind and remove all pink. Cut into cubes and soak overnight in the brine solution.
Drain rind, wash  in fresh water and drain.

Combine all remaining ingredients and boil for 5 minutes. Add rind a few at a time and boil for about 30 minutes. Pack rind into sterilized jar and cover with with boiling syrup and seal. Process in boiling water path for 10 minutes.


Pickled Okra


I grew up eating Okra and I love it. It  has a different texture and one would have to acquire the taste I think.  It is a very common vegetable in the Philippines. When I moved to western Canada, I could only find them an Asian store, where as here I can find them in most of the food store. I was impressed the first few Sundays I was at church, sisters with home garden were giving away their extra Okra, I was in heaven.

Last Christmas, a friend gave me a jar of pickled Okra for a present. I hesitated for about 3 months thinking that although I like Okra, I couldn't really imagine the taste of pickled slimy Okra. When I finally opened the jar and tried it, I wished I had opened it sooner. It was not what I expected at all. It was crunchy and almost better than the fresh ones. I really enjoyed it so I decided to pickle some of my pickles from the garden.

I followed a recipe by Paula Deen.

Ingredients:
1 1/2 lbs fresh Okra
3 teaspoons dried dill
3 teaspoons sugar
2 cups of water
1 cup vinegar
2 tablespoons canning and pickling salt
3 (1 pint) canning jars, with lids, sterilized
My addition:
1/2  teaspoon of Ball Pickle crisp granules, in each jar

Preparation:
Sterilize all jars and lids. Note that this recipe is for 3 pint jars. Divide Okras evenly between the 3 jars. Place 1 teaspoon of sugar, 1 teaspoon of dill (or Italian seasoning), and 1/2 teaspoon of pickle crisp granules.

In a medium saucepan, combine all ingredients and bring it to a boil. While mixture is still hot, pour it into the jar and fill it up leaving 1/4 inch at the top. Wipe the bottle rim clean and place lids. Process in boiling water bath for 10 minutes making sure the water level covers the entire jars. Remove from water bath and cool on the counter.

Spinach and Feta Cheese Salad


I think I eat more salad during the warmer weather. How about you? I was craving a hearty salad and this was simple enough to make and very nutritious. During the spring to fall garden, I get a lot of spinach, but since it's winter, I used store bought spinach. They will definitely taste even better with the spinach and vegetables fresh from the garden.

5 cups of baby spinach
1/2 of red bell pepper, cubed
1/2 of cucumber, quartered
1/2 of avocado, cubed
1/2 cup of black olives, halves
2 tbs of Feta Cheese
2 tbs of onions, chopped
1 tsp of olive oil
dash of salt and pepper

This is ready to serve (5 serving) on the side with your choice of dressing or as an added topping on your pizza. See Green Pizza

The above picture has apples and Parmesan cheese added on the salad. Really yummy.


Green Pizza


My family loves pizza so I often make my pizza's from scratch and I try to find ways to feed my family something more healthier, and that's when I thought of the Brown's Green Pizza. This is also perfect for a Dr. Seuss day, Green Eggs and Ham, well how about Green Pizza!  My husband and I really enjoyed the salad topping on our pizza, you have got to try it. It was so delicious. Using the spinach and vegetables from your garden, even better!

For the salad recipe, Spinach and Feta Cheese salad

 I did not expect my kids to be excited about a salad topping on their pizza, so I made a regular pepperoni pizza with green sauce and they could not even taste the difference.


Green sauce. I put 2 handful of baby spinach in my magic bullet cup, then added Hunts tomato sphagetti sauce ( I would have used my home made spaghetti sauce but I have already run out) and a couple of spoonful of tomato paste. It depends on how much sauce you need. Add some basil and oregano if preferred, but since I am trying this for my kids, I did not want to overpower the tomato sauce.


The top picture shows you my first handful blend of spinach and sauce, then the bottom I added the second handful of spinach as I can only fit that much at a time. I added a bit more sauce and tomato paste. Other than the color, the kids did not realized their pizza was loaded with spinach. My oldest who is 7 says, "I knew there were spinach in there, but I ate it anyway. I could not really taste the spinach." I am one happy mom.

Indoor grower

Every year I always try to plant my seedlings indoor early, around end of January, but most of them usually do not last by the time I have to plant them out side. I am so anxious to get started and wanted my plants to be like the ones at the store by the time I transplant them outside. I figured I spent about $3.50 per tomato plant and bell pepper for about 15 plants total, well that comes up to about $18.50. Plus I also have other plants I want to grow.

Finally, I thought it would be a good investment to have my own grower indoor. My handy husband bought it and installed it under our kitchen cupboard. The plants you see here are 4-5 weeks old. The more vigorous looking ones are zucchini, the tallest are okra and then there are tomatoes, and smallest ones are bell peppers. In the front  grower, are the broccoli and kale.

Broccoli and Kale

To the left are zucchini plants, in middle are the tomatoes, next to the right are smaller sized bell peppers, and the towering skinny ones are okra.


Water bottle planter. This is my son's science project. It is basically a  water bottle cut in a half. The bottom part held the water and the top part with the cap on was holding the yarn that soaks up water to the dirt. Voila! Look at his flower seedling he planted just for me. This flower plant is about is 3 weeks.

This is what the grower light looks like under my kitchen cupboard.  I used the Hydrofarm Fluorescent Grow light 24 in. You can find them on Amazon for $30.00. The one we bought did not have the valance, so my husband made one up with card stock paper and aluminum foil, that is what you see shining around the fluorescent light.

Now I am ready to plant outside. The spring cannot come soon enough with this giant snowman in my lawn.

February 25, 2015


Green Pepper Tomato Salad

INGREDIENTS:
3 medium tomatoes, seeded and chopped
1 medium green pepper, chopped
1 celery rib, thinly sliced
1/2 cup chopped red onion
2 tablespoons cider vinegar
1 tablespoon sugar
1/2 teaspoon salt
1/8 teaspoon pepper

DIRECTIONS:
In large bowl, combine the tomatoes, green pepper, celery and onion. In a small bowl, combine the vinegar, sugar, salt,  & pepper. Stir into  tomato mixture. Cover and refrigerate for at least 2 hours, stirring several times, before serving.

Spinach Chips / Kale chips


SPINACH CHIPS


I have tried this for the first time, and I love it. My spinach garden produced a lot this spring (2013) so I was trying a variety of recipe to do with the spinach.

I simply put the washed spinach in a bowl and put a couple of drops of Olive oil, and then sprinkle Italian herb seasoning. Lay them on a waxed paper and bake at 325 F for about 10 minutes. They come out really thin, almost like Sushi wrapper, but they are delicious.

Kale Chips

Since Kale have broader leaves, I first pull out the oven racks; preheat the oven at 250 F and then I lay the kale leaves on top of the rack. When the oven is heat, I slide the racks back in with the kale leaves on them and bake for 10-15 minutes.

For seasoning, I have also used olive oil andgarlic powder mixed with meat rub seasoning as an option. I am sure you can do some with cinnamon flavor If you like cinnamon.
Pak Choi
Pak Choi, another favorite Asian Vegetables. I planted the Pak Choi bonsai hybrid and is perfect for high density plantings. The short compact plants have a uniform vase-like shape. Excellent choice for "baby" pak choi production.

Excellent for stir-fry dishes and soup.

When to plant.  Plant in March to April. Plant at 2 weeks interval in spring and late summer for almost constant supply. Keep soil moist and well fertilized. Sow again in late summer for fall harvest. 

How to plant. Sow directly in the garden in sunny location as early as soil can be worked. Cool weather vegetable. Plant seeds every 6 inches, covering firmly with soil. Thin plants to 18 inches apart when they are 4 inches tall.


Light
Full sun
Seed Depth
1/4 in
Spacing Row/plant
18 in/8 in
Days to germinate
10-14
Days to harvest
40-45


Harvest. I have harvested the outer layer and the plant keeps producing. So yea, you do not need to harvest the entire plant.


Mussel with Ginger Soup. This is a typical mussel dish in Philippines. I grew up with this menu and I still love it. I always have sea food on my birthday, so I decided to make this soup along with the Baked Mussels with Cheese. I should make them more often because it is delicious.


INGREDIENTS:
  • 3 tbs minced ginger
  • 3 cloves of garlic, minced
  • 1 onions
  • gree onions
  • 2 medium tomatoes
  • chicken broth (2 cups)
  • green leafy vegetables (long cabbage, pak choi, suo choi) I used Tsai-Hsin
  • oil for frying
  • salt and pepper
Note: You can vary the amount of these ingredients, for example, if you want more ginger taste, add more ginger.
Tsai-Hsin

DIRECTIONS:
  • Heat up oil in a large pan. Stir saute garlic, onions, tomatoes, and ginger for about 2 minutes.
  • Add in mussels, stir for a minute.
  • Add chicken broth. Add leafy vegetables. Bring to a boil and let it simmer for 10 minutes. 
  • Add salt and pepper to taste.

Baked Mussels with Cheese

INGREDIENTS:

  • 3 - 4 lbs mussels (New Zealand mussels)
  • 1/2 cup butter or margarine
  • 5 cloves garlic, minced
  • 1/2 cup grated cheese, cheddar or mozzarella (Quick Melt type)
  • 1/2 cup Italian bread crumbs
  • Green onions (optional)


  • DIRECTIONS:
    • Place mussels on a pan (no water), cover and cook over moderate heat.
    • When shells open up, drain.
    • Remove top shell.
    • Melt butter, add minced garlic.
    • Stir for 3 minutes.
    • Brush each mussel meat with butter-garlic mixture, top with grated cheese and cover with bread crumbs. Add green onions as an optional topping.
    • Arrange mussels on a baking sheet.
    • Bake in pre-heated oven with a low heat (250F).
    • Bake for 10 – 15 minutes


      I enjoy seafood, in particular mussels. For my birthday this year (2012), i thought I would brave it and cook my seafood dish instead of going to a restaurant. It was so delicious. This recipe that I used was very very simple and it did not take long to make. Try it and you will see what  I mean.
    Okonomiyaki
    Okonomiyaki, Japanese dish, my new favorite. My in laws came to visit us in April and May 2012, and they showed me their version of Okonomiyaki and fell in love with the dish.

    INGREDIENTS:
    • 2 cup all purpose flour
    • 1 1/4 cup dashi soup stock or water
    • 4-6 eggs
    • shrimps, chopped or cut into smaller pieces
    • 1 - 1 1/2 lb cabbage, finely chopped
    • 4-6 Tbsp chopped green onion
    • bacon
    Sauce: Mixed mayo and ketchup.


    DIRECTIONS:
    • Make hondashi soup stock and pour in a large bowl.
    • Add all ingredients, except for bacon, and mix the batter.
    • Heat electric pan or skillet, place 2 to 3 bacon (half the length), and pour the batter on top of the bacon creating a round shape. Cook for about 5-7 minutes. 
    • Flip the okonomiyaki and cook the other side for about 5 minutes or until cooked through. 
    • Flip the okonomiyaki again and spread sauce on top.
    • Serve it while it is hot. Enjoy.