Carribean Salsa

You Will Need:

  • 10 cups chopped cored peeled tomatoes (about 25 medium)
  • 5 cups chopped seeded green bell peppers (about 4 large)
  • 5 cups chopped onions (about 6 to 8 medium)
  • 2-1/2 cups chopped seeded chili peppers, such as hot banana, Hungarian wax, serrano or jalapeño (about 13 medium)
  • 1-1/4 cups cider vinegar
  • 3 cloves garlic, finely chopped
  • 2 Tbsp finely chopped cilantro
  • 1 Tbsp salt
  • 1 to 2 ripe mangos, cubed
  • 2 cans of tomato paste
  • 2-3 Tbsp of brown sugar, depends on your liking of sweetness for salsa
  • 6 qt or 12 pint glass preserving jars with lids and bands


Half Recipe:

  • 5 cups chopped cored peeled tomatoes (about 13 medium)
  • 2-1/2 cups chopped seeded green bell peppers (about 2 large)
  • 2-1/2 cups chopped onions (about 3 to 4 medium)
  • 1-1/4 cups chopped seeded chili peppers, such as hot banana, Hungarian wax, serrano or jalapeño (about 7 medium)
  • 3/4 cup cider vinegar
  • 1 to 2 cloves garlic, finely chopped
  • 1 Tbsp finely chopped cilantro
  • 1-1/2 tsp salt
  • a can of tomato paste
  • 1 ripe mango, cubed (or you can put as many as you like mangos)
  • 1-2 Tbsp of brown sugar depending how you like your salsa sweet
  •  Tbsp brown sugar
  • 6 (16 oz) pint

Directions:

  1. PREPARE boiling water canner. Heat jars in simmering water until ready for use. Do not boil.  Wash lids in warm soapy water and set bands aside.
  2. COMBINE tomatoes, green peppers, onions, chili peppers, vinegar, garlic, cilantro, salt, brown sugar and cubed mango, if using, in a large stainless steel saucepan. Bring to a boil over medium-high heat, stirring constantly. Reduce heat and boil gently, stirring frequently, until slightly thickened, about 10 minutes.
  3. LADLE hot salsa into hot jars, leaving 1/2 inch headspace. Remove air bubbles and adjust headspace, if necessary, by adding hot salsa. Wipe rim. Center lid on jar. Apply band until fit is fingertip tight.
  4. PROCESS both pint and half pint jars in a boiling water canner for 15 minutes, adjusting for altitude. Remove jars and cool. Check lids for seal after 24 hours. Lid should not flex up and down when center is pressed.

Cilantro


Cilantro, hmmm, it smells so good. My cilantro plants survived the winter. I have plenty and they go to bolt quickly than I can consume and give away so I try and cut the mature branches to prolong the life of the plant as it continues to produce younger plants/branches beside the mature branch that I just cut out. Below is a picture of one of my cilantro plant going to bolt so I can save seeds for next planting seasonl


Share with me!

Thank you for visiting my website. This is still a work in progress. Most of my pictures were taken in year 2011, but this blog was started just February 2012. This is a whole new adventure for me. Although my blog is about gardening and food, it is far be it from toiling in the dirt or tasting cuisine. There is a lot to share and learn. I am very very excited. Here is a challenge for you.

Pickled Watermelon rind?

 Exactly right! Who would have thought that you can pickle water melon rind? Well, I got to try it and it is pretty good. My husband said it almost tasted like chunky pineapple tidbits, less the cinnamon flavor. It is certainly new to me, but I am the kind of person that don't like to waste anything. This has a new taste and I like it. I have yet to try other ways to use water melon rind, but here is the recipe I used:

Ingredients: (Yields 5-6 pints)
4 lbs watermelon rind
2 cups vinegar (white)
2 cups water
4 cups sugar
3 cinnamon sticks
1 teaspoon whole cloves
1 teaspoon whole spice
1 lemon, sliced thin

Brine
1/4 cup of salt
1 quart water

Preparations:
Pare watermelon rind and remove all pink. Cut into cubes and soak overnight in the brine solution.
Drain rind, wash  in fresh water and drain.

Combine all remaining ingredients and boil for 5 minutes. Add rind a few at a time and boil for about 30 minutes. Pack rind into sterilized jar and cover with with boiling syrup and seal. Process in boiling water path for 10 minutes.


Pickled Okra


I grew up eating Okra and I love it. It  has a different texture and one would have to acquire the taste I think.  It is a very common vegetable in the Philippines. When I moved to western Canada, I could only find them an Asian store, where as here I can find them in most of the food store. I was impressed the first few Sundays I was at church, sisters with home garden were giving away their extra Okra, I was in heaven.

Last Christmas, a friend gave me a jar of pickled Okra for a present. I hesitated for about 3 months thinking that although I like Okra, I couldn't really imagine the taste of pickled slimy Okra. When I finally opened the jar and tried it, I wished I had opened it sooner. It was not what I expected at all. It was crunchy and almost better than the fresh ones. I really enjoyed it so I decided to pickle some of my pickles from the garden.

I followed a recipe by Paula Deen.

Ingredients:
1 1/2 lbs fresh Okra
3 teaspoons dried dill
3 teaspoons sugar
2 cups of water
1 cup vinegar
2 tablespoons canning and pickling salt
3 (1 pint) canning jars, with lids, sterilized
My addition:
1/2  teaspoon of Ball Pickle crisp granules, in each jar

Preparation:
Sterilize all jars and lids. Note that this recipe is for 3 pint jars. Divide Okras evenly between the 3 jars. Place 1 teaspoon of sugar, 1 teaspoon of dill (or Italian seasoning), and 1/2 teaspoon of pickle crisp granules.

In a medium saucepan, combine all ingredients and bring it to a boil. While mixture is still hot, pour it into the jar and fill it up leaving 1/4 inch at the top. Wipe the bottle rim clean and place lids. Process in boiling water bath for 10 minutes making sure the water level covers the entire jars. Remove from water bath and cool on the counter.

Spinach and Feta Cheese Salad


I think I eat more salad during the warmer weather. How about you? I was craving a hearty salad and this was simple enough to make and very nutritious. During the spring to fall garden, I get a lot of spinach, but since it's winter, I used store bought spinach. They will definitely taste even better with the spinach and vegetables fresh from the garden.

5 cups of baby spinach
1/2 of red bell pepper, cubed
1/2 of cucumber, quartered
1/2 of avocado, cubed
1/2 cup of black olives, halves
2 tbs of Feta Cheese
2 tbs of onions, chopped
1 tsp of olive oil
dash of salt and pepper

This is ready to serve (5 serving) on the side with your choice of dressing or as an added topping on your pizza. See Green Pizza

The above picture has apples and Parmesan cheese added on the salad. Really yummy.


Green Pizza


My family loves pizza so I often make my pizza's from scratch and I try to find ways to feed my family something more healthier, and that's when I thought of the Brown's Green Pizza. This is also perfect for a Dr. Seuss day, Green Eggs and Ham, well how about Green Pizza!  My husband and I really enjoyed the salad topping on our pizza, you have got to try it. It was so delicious. Using the spinach and vegetables from your garden, even better!

For the salad recipe, Spinach and Feta Cheese salad

 I did not expect my kids to be excited about a salad topping on their pizza, so I made a regular pepperoni pizza with green sauce and they could not even taste the difference.


Green sauce. I put 2 handful of baby spinach in my magic bullet cup, then added Hunts tomato sphagetti sauce ( I would have used my home made spaghetti sauce but I have already run out) and a couple of spoonful of tomato paste. It depends on how much sauce you need. Add some basil and oregano if preferred, but since I am trying this for my kids, I did not want to overpower the tomato sauce.


The top picture shows you my first handful blend of spinach and sauce, then the bottom I added the second handful of spinach as I can only fit that much at a time. I added a bit more sauce and tomato paste. Other than the color, the kids did not realized their pizza was loaded with spinach. My oldest who is 7 says, "I knew there were spinach in there, but I ate it anyway. I could not really taste the spinach." I am one happy mom.

Indoor grower

Every year I always try to plant my seedlings indoor early, around end of January, but most of them usually do not last by the time I have to plant them out side. I am so anxious to get started and wanted my plants to be like the ones at the store by the time I transplant them outside. I figured I spent about $3.50 per tomato plant and bell pepper for about 15 plants total, well that comes up to about $18.50. Plus I also have other plants I want to grow.

Finally, I thought it would be a good investment to have my own grower indoor. My handy husband bought it and installed it under our kitchen cupboard. The plants you see here are 4-5 weeks old. The more vigorous looking ones are zucchini, the tallest are okra and then there are tomatoes, and smallest ones are bell peppers. In the front  grower, are the broccoli and kale.

Broccoli and Kale

To the left are zucchini plants, in middle are the tomatoes, next to the right are smaller sized bell peppers, and the towering skinny ones are okra.


Water bottle planter. This is my son's science project. It is basically a  water bottle cut in a half. The bottom part held the water and the top part with the cap on was holding the yarn that soaks up water to the dirt. Voila! Look at his flower seedling he planted just for me. This flower plant is about is 3 weeks.

This is what the grower light looks like under my kitchen cupboard.  I used the Hydrofarm Fluorescent Grow light 24 in. You can find them on Amazon for $30.00. The one we bought did not have the valance, so my husband made one up with card stock paper and aluminum foil, that is what you see shining around the fluorescent light.

Now I am ready to plant outside. The spring cannot come soon enough with this giant snowman in my lawn.

February 25, 2015


Green Pepper Tomato Salad

INGREDIENTS:
3 medium tomatoes, seeded and chopped
1 medium green pepper, chopped
1 celery rib, thinly sliced
1/2 cup chopped red onion
2 tablespoons cider vinegar
1 tablespoon sugar
1/2 teaspoon salt
1/8 teaspoon pepper

DIRECTIONS:
In large bowl, combine the tomatoes, green pepper, celery and onion. In a small bowl, combine the vinegar, sugar, salt,  & pepper. Stir into  tomato mixture. Cover and refrigerate for at least 2 hours, stirring several times, before serving.

Spinach Chips / Kale chips


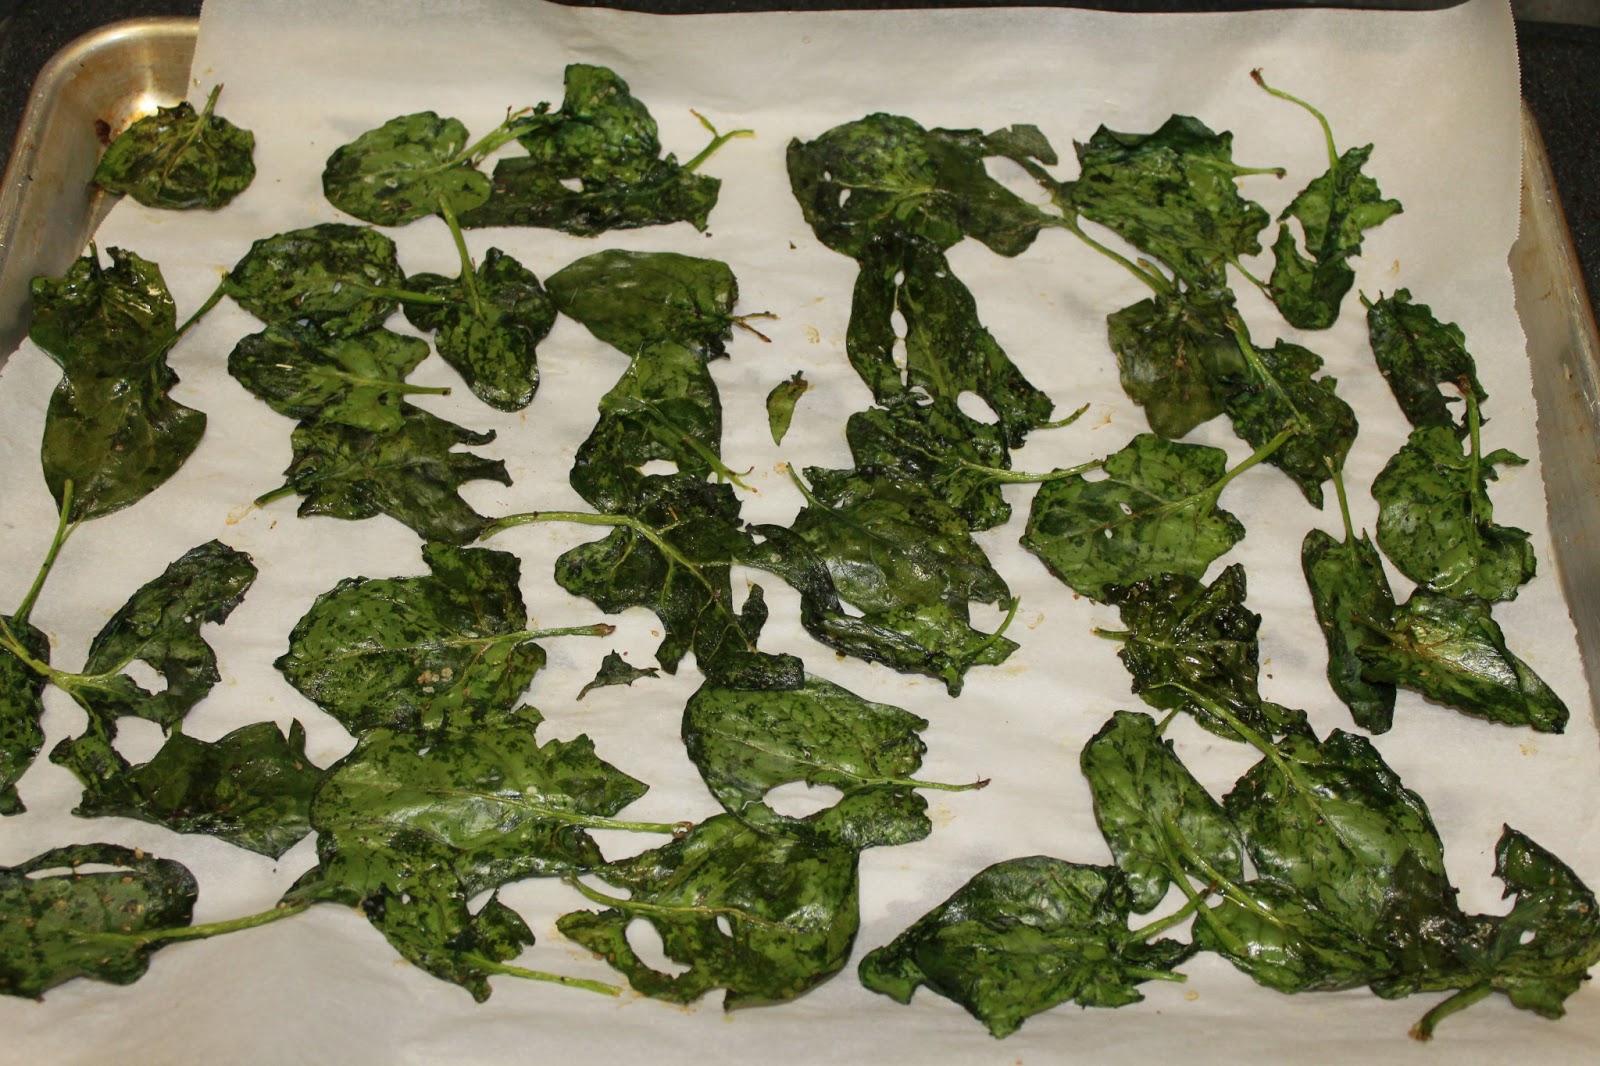
SPINACH CHIPS


I have tried this for the first time, and I love it. My spinach garden produced a lot this spring (2013) so I was trying a variety of recipe to do with the spinach.

I simply put the washed spinach in a bowl and put a couple of drops of Olive oil, and then sprinkle Italian herb seasoning. Lay them on a waxed paper and bake at 325 F for about 10 minutes. They come out really thin, almost like Sushi wrapper, but they are delicious.

Kale Chips

Since Kale have broader leaves, I first pull out the oven racks; preheat the oven at 250 F and then I lay the kale leaves on top of the rack. When the oven is heat, I slide the racks back in with the kale leaves on them and bake for 10-15 minutes.

For seasoning, I have also used olive oil andgarlic powder mixed with meat rub seasoning as an option. I am sure you can do some with cinnamon flavor If you like cinnamon.
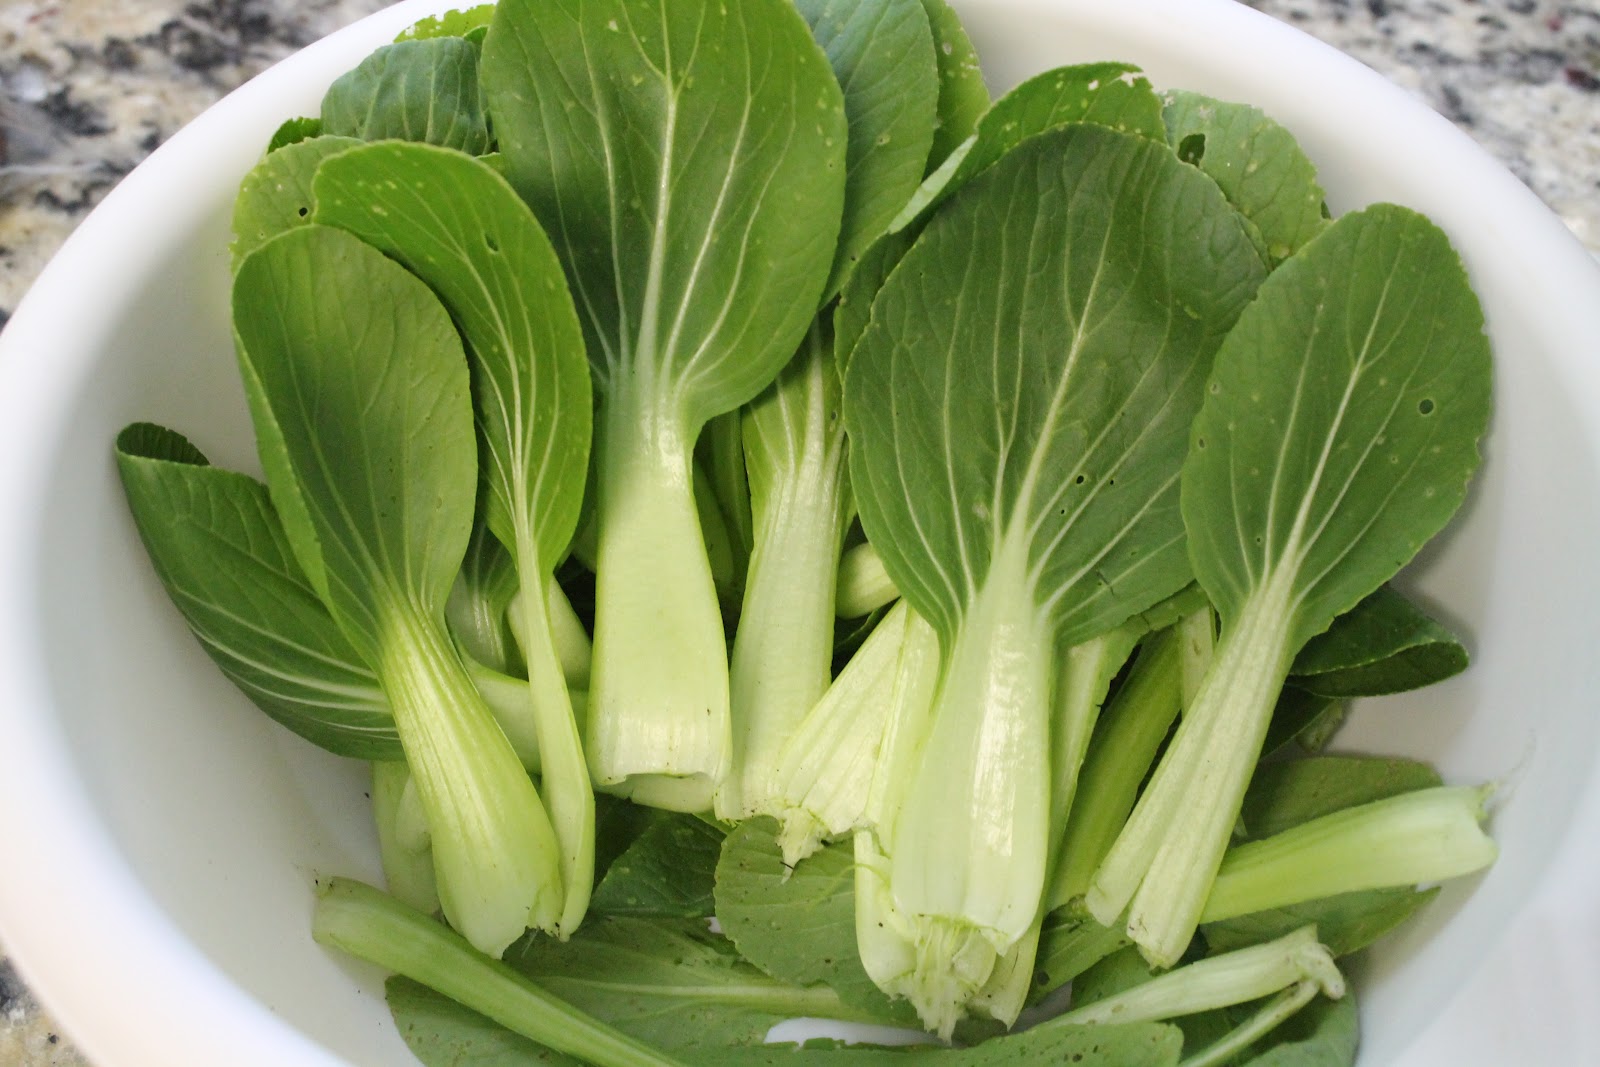
Pak Choi
Pak Choi, another favorite Asian Vegetables. I planted the Pak Choi bonsai hybrid and is perfect for high density plantings. The short compact plants have a uniform vase-like shape. Excellent choice for "baby" pak choi production.

Excellent for stir-fry dishes and soup.

When to plant.  Plant in March to April. Plant at 2 weeks interval in spring and late summer for almost constant supply. Keep soil moist and well fertilized. Sow again in late summer for fall harvest. 

How to plant. Sow directly in the garden in sunny location as early as soil can be worked. Cool weather vegetable. Plant seeds every 6 inches, covering firmly with soil. Thin plants to 18 inches apart when they are 4 inches tall.


Light
Full sun
Seed Depth
1/4 in
Spacing Row/plant
18 in/8 in
Days to germinate
10-14
Days to harvest
40-45


Harvest. I have harvested the outer layer and the plant keeps producing. So yea, you do not need to harvest the entire plant.


Mussel with Ginger Soup. This is a typical mussel dish in Philippines. I grew up with this menu and I still love it. I always have sea food on my birthday, so I decided to make this soup along with the Baked Mussels with Cheese. I should make them more often because it is delicious.


INGREDIENTS:
  • 3 tbs minced ginger
  • 3 cloves of garlic, minced
  • 1 onions
  • gree onions
  • 2 medium tomatoes
  • chicken broth (2 cups)
  • green leafy vegetables (long cabbage, pak choi, suo choi) I used Tsai-Hsin
  • oil for frying
  • salt and pepper
Note: You can vary the amount of these ingredients, for example, if you want more ginger taste, add more ginger.
Tsai-Hsin

DIRECTIONS:
  • Heat up oil in a large pan. Stir saute garlic, onions, tomatoes, and ginger for about 2 minutes.
  • Add in mussels, stir for a minute.
  • Add chicken broth. Add leafy vegetables. Bring to a boil and let it simmer for 10 minutes. 
  • Add salt and pepper to taste.

Baked Mussels with Cheese

INGREDIENTS:

  • 3 - 4 lbs mussels (New Zealand mussels)
  • 1/2 cup butter or margarine
  • 5 cloves garlic, minced
  • 1/2 cup grated cheese, cheddar or mozzarella (Quick Melt type)
  • 1/2 cup Italian bread crumbs
  • Green onions (optional)


  • DIRECTIONS:
    • Place mussels on a pan (no water), cover and cook over moderate heat.
    • When shells open up, drain.
    • Remove top shell.
    • Melt butter, add minced garlic.
    • Stir for 3 minutes.
    • Brush each mussel meat with butter-garlic mixture, top with grated cheese and cover with bread crumbs. Add green onions as an optional topping.
    • Arrange mussels on a baking sheet.
    • Bake in pre-heated oven with a low heat (250F).
    • Bake for 10 – 15 minutes


      I enjoy seafood, in particular mussels. For my birthday this year (2012), i thought I would brave it and cook my seafood dish instead of going to a restaurant. It was so delicious. This recipe that I used was very very simple and it did not take long to make. Try it and you will see what  I mean.
    Okonomiyaki
    Okonomiyaki, Japanese dish, my new favorite. My in laws came to visit us in April and May 2012, and they showed me their version of Okonomiyaki and fell in love with the dish.

    INGREDIENTS:
    • 2 cup all purpose flour
    • 1 1/4 cup dashi soup stock or water
    • 4-6 eggs
    • shrimps, chopped or cut into smaller pieces
    • 1 - 1 1/2 lb cabbage, finely chopped
    • 4-6 Tbsp chopped green onion
    • bacon
    Sauce: Mixed mayo and ketchup.


    DIRECTIONS:
    • Make hondashi soup stock and pour in a large bowl.
    • Add all ingredients, except for bacon, and mix the batter.
    • Heat electric pan or skillet, place 2 to 3 bacon (half the length), and pour the batter on top of the bacon creating a round shape. Cook for about 5-7 minutes. 
    • Flip the okonomiyaki and cook the other side for about 5 minutes or until cooked through. 
    • Flip the okonomiyaki again and spread sauce on top.
    • Serve it while it is hot. Enjoy.                     

    Simple Baked Cheesecake

     
     INGREDIENTS:

    Crust:
    2 1/4 cup graham cracker crumbs
    1/2 cup butter or margarine, melted
    Ground walnut (optional), amount-as desired

    Filling:
    1 (8 oz.) pkg. cream cheese, softened
    1 Tbsp. lemon juice
    1/2 cup sugar
    1/4 cup milk
    Dash of salt
    1/2 tsp. vanilla
    2 eggs

    Topping:
    2 Tbsp. sugar
    1 cup sour cream
    1/2 tsp. vanilla


    DIRECTIONS:

    1. Combine graham cracker crumbs and butter, press into buttered 8 inch pie plate to form crust on bottom and sides.
    2. In a mixing bowl, beat cream cheese until fluffy. Gradually add in lemon juice, 1/2 cup sugar, milk, salt and vanilla.
    3. Add eggs, 1 at a time, mixing well after each addition. Pour filling into crust.
    4. Bake at 325 degrees F for 25 to 30 minutes or until set.
    5. Combine the 2 tablespoons of sugar, sour cream, and 1/2 teaspoon of vanilla; spread over top of cheesecake then bake for 10 minutes longer. Chill for 5 hours or more before serving.

    German Pancake


    If you ask my son Elias how to make German Pancake, he will tell you:

    6 eggs
    1 cup of flour
    1 cup of milk

    Bake it in 400 degrees F, and then he will say "that's it". Yes it is that simple and it is very yummy.

    DIRECTIONS:

    1. In  a large baking pan, pour 2 table spoon of cooking oil. Spread around the pan. Put it in the oven to heat up for about 5 minutes.

    2. While pan is heating up, using mixer, mix all ingredients at medium speed for about 1 minute.


    3. Pull out the pan from the oven using cooking mittens, pour batch into the pan. Place it back in the oven and cook for about 20 minutes.

     4. Serve while warm. Sprinkle lemon juice and icing sugar. Serve it while it is hot. Enjoy.
     Note: I like mine with a lot of lemon juice, while others may not like it that way. You can serve them and have individuals put their lemon juice or not. Enjoy!


    Dollar Pancakes

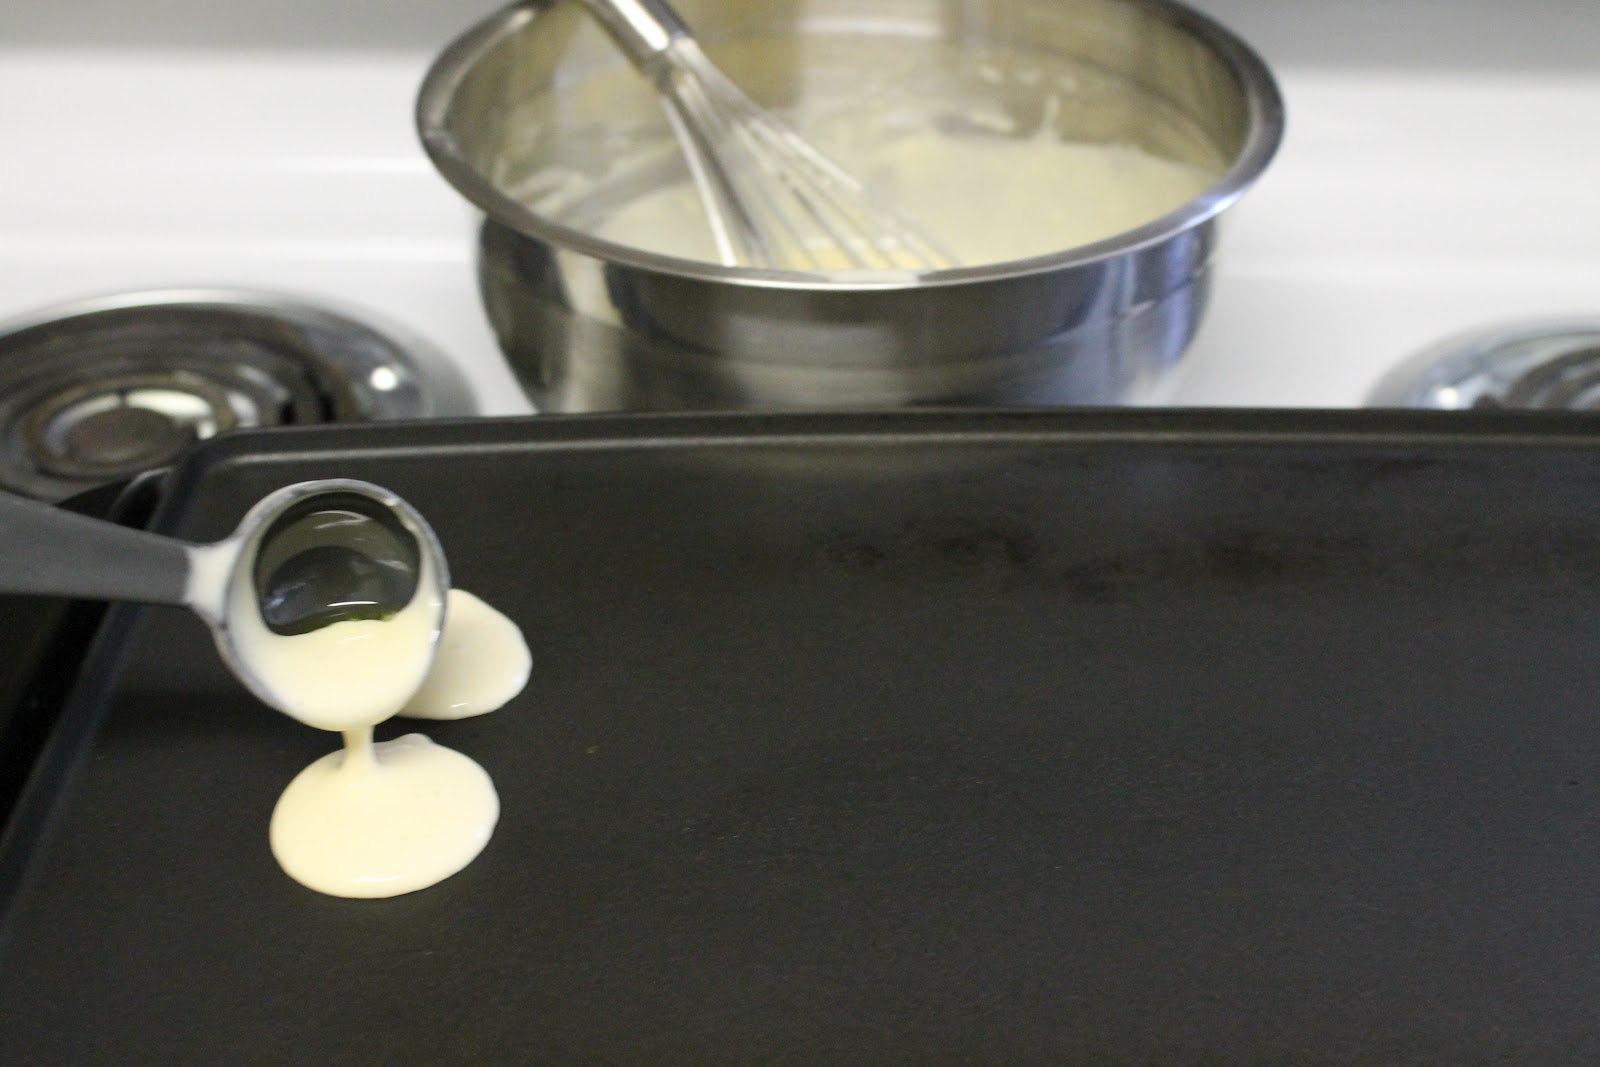
    It is called "Dollar Pancakes." Only Canadians can relate since the Americans do not have a $1 dollar coin, ha ha ha. These dollar pancakes is one of my son's favorite breakfast. I cannot count how many he can eat at one time, he loves it. He in fact, helps me make them. For fun, we make alphabets or numbers or shapes with the batter. It's a fun way to have your child help make their own breakfast, and also a fun way to teach number, alphabets, and shapes

    INGREDIENTS:

    1 large egg
    1 cup all purpose or whole wheat flour
    3/4 cup milk
    1 tbsp granulated or packed brown sugar
    2 tbsp vegetable oil
    3 tsp baking powder
    1/4 tsp salt
    Butter, stick margarine or shortening

    Note: This recipe is a regular pancake recipe.

    DIRECTIONS:
    1. Beat egg in medium bowl with hand beater until fluffy. Beat in remaining ingredients except butter just until smooth. For thinner pancakes, stir in additional 1 to 2 tablespoons milk.
    2. Heat griddle or skillet over medium heat or to 375 degrees F. (To test griddle, sprinkle with a few drops of water. If bubbles jump around, heat is just right.) Grease griddle with butter if necessary.
    3. Use a tablespoon to measure and cook 2 dollar pancakes per tablespoon. The tablespoon is also ideal for shaping.
    4. Cook pancake until bubbly on top, puffed and dry around edges. Turn and cook other side until golden brown.

    Meat Spring Roll

    INGREDIENTS:
    2 lbs of ground meat (beef or pork)
    3 medium size carrots
    2 eggs
    1 onion
    garlic, 4 cloves or a tsp of garlic powder
    1/2 cup flour
    1 tsp salt
    1 tsp sugar
    1/3 cup of  ketchup
    Black pepper
    Egg wrapper
    Water in a small bowl

    DIRECTIONS:
     Fillings:
    1. Place meat in a bowl. Add all ingredients. Carrots, onions, and garlic cloves are chopped to smaller pieces using food processor.


     2. Mix ingredients well making sure there are no lumps of meat.


    3. Pull the wrapper out of the plastic container. The picture you see shows a full size wrapper. I usually cut them in half in the center lengthwise to create two set of triangle shaped wrappers as seen in picture.


    The wrappers are stuck together so you will have to pull it apart one at a time.


    Wrapping:
    4. Get ready to fill your wrapper. Lay one wrapper on a plate. Have that bowl of water on the side for easy access.
     5. Take a teaspoonful of the filling and spread it lengthwise on the bottom side of wrapper leaving about 1/4 inch space from the bottom of the wrapper and leaving about an inch or two on both bottom pointy sides of the wrapper.

     6. Fold in both left and right bottom corner of the wrapper.


    7. Begin folding from the bottom, and roll all the way leaving about 1/2 inch from the top. As you roll, press gently to make a rounded looking shape instead of flat.
     8. Slight moist the top corner with water and continue rolling. The moistened part will make the wrapper stick and seal it up and prevent it from opening.


    Frying:
    9. In a pan, heat up oil to medium heat. You can test the oil when it's heated by dipping a corner of spring roll and it should sizzle when it is ready.

    Note: Make sure to have enough oil to cover at least half of the spring roll (lengthwise) if not all.

    10. Fry spring roll about 3 minutes on each side.

     11. Placed cooked spring roll on a plate laden with paper towel to remove some of the cooking oil.


    12. Serve it hot with a chili pepper famous for Asian chicken sauce or spring roll. You should be able to find this in any Asian market.


    Enjoy!